Installation Guide
Installation
Prior to installation
Please pay attention to the points below before installing, updating or unintalling Alfresco Connector for Confluence plugin.
- Your Alfresco must be structured and be ready for use in order to start using Alfresco Connector for Confluence.
Please refer to Supported Platform
To Install
- Select "Add-ons" from the "Administration" menu on the top right of Confluence screen.
- Select "Manage add-ons" on the left hand panel of the add-on screen.
- Type "Alfresco Connector for Confluence" in the search box on the right of the screen and perform a search
- Click on "Buy now" or "Free Trial".
To Update
- Select "Add-ons" in the menu of the "administration" on the top right of Confluence screen.
- Select "Manage add-ons" on the left hand panel of the screen.
- Select "Alfresco Connector for Confluence" on the right of the screen.
- Click on "Update". Make sure the installation succeeded.
To Uninstall
- Select "Add-ons" in the menu of "administration" on the top right of Confluence screen.
- Select "Manage add-ons" on the left hand panel of the screen.
- Select "Alfresco Connector for Confluence" on the right of the screen.
- Click on "Uninstall".
- Click on "Continue".
- Verify that the uninstalling is completed.
To Configure License Key
The license key needs to be entered in order to use the notification of Expiry Date.
- Select "Manage add-ons" in the Add-ons screen.
- Select "Alfresco Connector for Confluence" on the right of the screen.
- Enter a license key.
- Click on "Update".
Setting up
Setting up after Initial Installation
After the initial installation, mapping from Confluence to Alfresco connection configuration and Alfresco folders is needed.
Connection Setting
- Go to the connection screen by selecting "Add-ons", "Alfresco", then "Connection Setup" in "Administrator" menu.
- Click on "Edit" and display the Edit screen
- Specify "Alfresco URL" for remote application connected from a browser, in "Alfresco Display URL".
- Specify "Alfresco URL" for remote application connected from a server, "Alfresco Application URL".
- Select "Basic" for "Authentication Type".
- Select "Grant access to users with admin profile." or "Grant access to users with own profile" for "Access type". Please refer to the Access Type for more information .
- Specify a user name for an Administrator user in "User Name".
- Specify a password for the Administrator user in "Password"
- Click on "Update" button.
Alfresco accept 'WSSE' authentication type, the type is more secure connection than 'Basic' type due to hashed user password when connecting Confluence to Alfresco.
If you use the authentication type, it reqirs Alfresco Authetifivcation plugin. See more details 'Instllation Guide for Alfresco Authentication plugin(English)'.
Access Type
VERSION 1.3.0+
Access type on Connection setup screen, you can select the following two options.
Grant access to users with admin profile
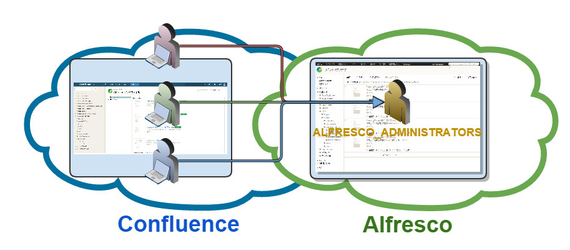
Select this option if you like Confluence users to share the connection user to Alfresco set in connection setup screen.
Confluence users can operate on Alfresco folders and files based on the shared connection user to Alfresco.
- Grant access to users with own profile
- Select this option if you like Confluence users to use the own connection user to Alfresco set in user profile screen.
- Confluence users can operate on Alfresco folders and files based on the own connection user to Alfresco.
- Setting connection user in the user profile screen, please refer to Connection user setting in the user profile screen.
Connection user setting in the user profile screen
VERSION 1.3.0+
Editing connection user setting
- Go to Alfresco screen through 'Profile'.
- Click '+Edit' in top of right side screen and show editing screen.
- Register any 'Username', `Password` for connecting to Alfresco.
- Click 'Update'.
Removing connection user setting
- Go to Alfresco screen through 'Profile'.
- Click '+Remove' in top of right side screen and show editing screen.
- Click 'Remove'.
Folder Mapping
Public folders and Private folders
- Public
You can assign a single folder of Alfresco to Confluence spaces.
In 'Public', the folder you want to share in the project that has been specified path. - Private
You can assign a single folder of Alfresco to Confluence spaces.
In 'Private', the folder available for each pages in the specified path will be created automatically.
- Public
The process to configure adding, editing and removing is same in 'Public' and 'Private'.
- Go to Folder Mapping screen through 'Administration>Add-ons>Alfresco>Folder Mapping'.
- Click '+Add' in top of right side screen and show editing screen.
- Register any 'Name'.
- Choose the uploaded folder path of Alfresco from 'Alfresco Folder Tree' and the path set automatically to 'Alfresco Folder'. You cannot register to this item directly.
- Choose a Confluence space which uses above Alfresco folder.
You can assign only a single folder of Alfresco to a Confluence space. - Click 'Update'.


